TIPS FOR PRESSING FLOWERS AND LEAVES
AND USING THEM CREATIVELY
SARAH SIERADZKI AND CINDY HASKO MHTA 2021
SELECTING AND PREPARING THE BOTANICALS:
- Try all the flowers and leaves in your garden—all it will cost you is a little time and effort. You may be surprised at what is most successful. When in doubt, try it out! Press only fresh flowers and leaves. Once they begin to fade or dry on the plant, they will not press as successfully. During walks in the autumn, collect leaves directly off the trees or ones on the ground that are freshly fallen. Most leaves will hold their colors beautifully. Japanese maples are a special favorite for their sculptural shapes and vivid colors.
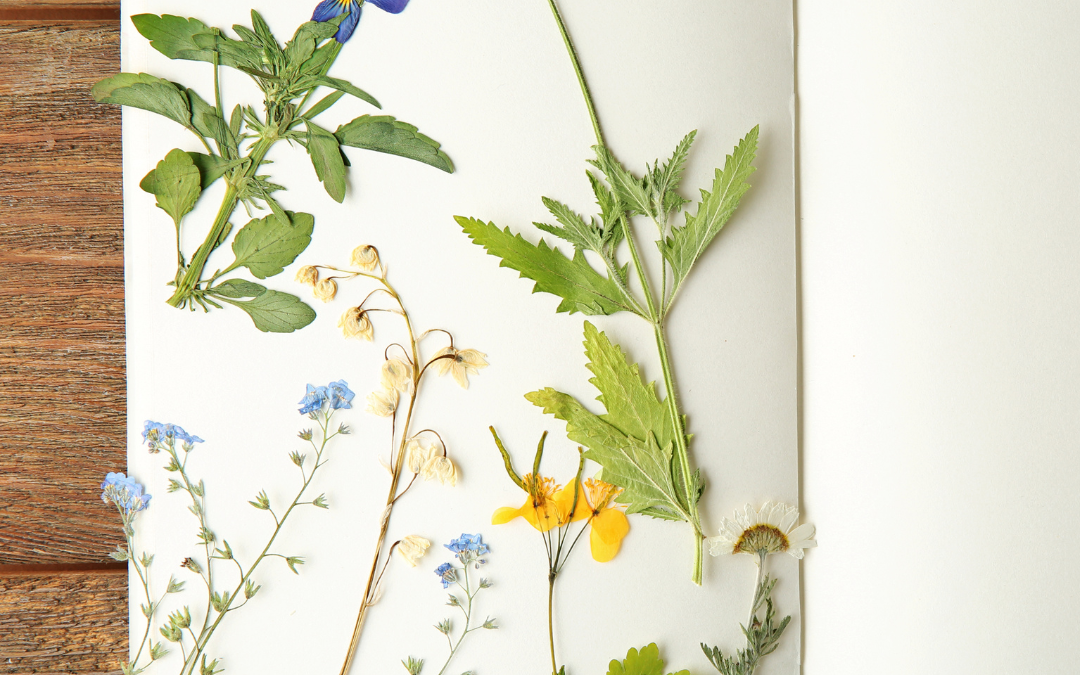
- The easiest plants to use are flat ones with flat centers. Pansies, Johnny jump ups, cosmos, geraniums, and Japanese anemones are simple flowers to begin pressing. Lay these flat and face down to press. Avoid overlapping them in the press.
- Leaves and foliage are the easiest plants to press as they are generally already thin and flat. After pressing, most leaves are sturdier to work with than most flowers, so they are easier for children and elders to use. Foliage will form the backbone of most of your flower designs. Many leaves have beautiful forms and textures when used individually for their sculptural shapes.
- Compound leaves such as ferns can be pressed singly in a page of the press. When using the dried fern, you can use it whole (which is difficult to glue) or cut off some of the leaflets to use as a background for floral designs.
- If you have access to florist bouquets either where you work or your own from the grocery, many of these leaves and flowers press beautifully. Fleshier flowers can be dried in the microwave (see below.) Any botanicals that are difficult to press can be dried to make potpourri instead.
- Other types of flowers will need special treatment in order to press them successfully. Once you try these techniques and see your results, you will be able to decide if they are worth your time and trouble to do again:
- Some flowers are easiest to press if you cut apart the entire flower head and press only the individual florets (examples: delphiniums, azaleas, larkspur, hydrangea, and rhododendrons.) In using pressed botanicals for designs, there is a huge need for smaller botanicals, so these are perfect for card making, bookmarks, candles, and other smaller projects. You will also get a large number of pressed botanicals from only a few flowers.
- Flowers with thick centers may mold (examples: rudbeckia, coneflowers, anemone coronaria, dahlias, gazanias, heliopsis, daisies, gaillardia.) If you wish to press these, you will need to remove the petals and press only these. When dry, you can reassemble them around a paper center or use another small flower to create the center. You can also try drying these in the microwave. (See below.)
- Some thicker flowers can be carefully cut in half lengthwise to reduce their thickness (examples: daffodils, tulips.) I cut daffodils starting with the stem, cutting it carefully in half up through the trumpet. Lay each half with the beautiful side up as you press them.
- Thicker flowers may be pressed by separating the petals, pressing them individually, and then reassembling them on paper (examples: roses, marigolds, zinnias, and chrysanthemums.) You can also try drying these in the microwave. (See below.)
- Spray ray type flowers with hairspray before and after pressing to keep them from shattering (examples: asters, daisies, flat mums, coreopsis, and flat dahlias.) These flowers will be most successful when dried in the microwave rather than the flower press.
- Be prepared for some flowers to change colors as they are pressed. Some paler colors will deepen in color (examples: bleeding heart and pink Japanese anemones.) Most white and pale yellow flowers will turn golden, tan or light brown, but still may have a lovely shape (example: daffodils.) Some flowers will not hold their color at all (example: blue balloon flowers turn white when pressed.)
USE A VERY INEXPENSIVE FLOWER PRESS—TELEPHONE BOOKS:
- (NOTE: It’s now hard to find telephone books. You can use a large heavy book–look at Half Priced Books and place botanicals between two pages of construction paper which also absorbs moisture easily.) You don’t need to use an expensive or unwieldy flower press to be successful when pressing flowers and leaves. Most plants will press beautifully in old telephone books as long as more weight is placed on top of them. The best techniques include:
- Center plant on inside part of telephone book page. Plants near the top and bottom of the page or on the outside half of the page will not always press successfully or evenly. You may be able to put 3 smaller flowers or leaves on each page.
- Some people use paper towels placed inside the telephone book, but this is not necessary. The ink from the book will not rub off on the plants, and the additional paper will not remove the plant’s moisture any better or quicker. SPECIAL TIP: Yellow page phone books work equally well as white pages books for pressing larger leaves and flowers. Place smaller flowers and leaves only in white pages telephone books to make it easier to find to remove them when pressing is complete. Smaller flowers are harder to spot in yellow pages as they tend to get lost in the multi-colored advertisements!
- Lay your flowers carefully on the page before closing in the book. It is often easiest to place them on the page upside-down. Make sure no petals are curled underneath, and do not let flowers touch each other on the page.
- Layer plants throughout the telephone book with 15-20 pages in between. The thicker the flower, the more pages are needed in between layers to absorb moisture.
- Mark the date and contents on a sticky note that will be visible from the end of the telephone book. This will help you know when to start checking the flowers to see if they are dry, and will help you find a particular flower or leaf when you are starting a special project.
- It is often helpful to cut a number of flowers, or pick a number of leaves, then press all at once. Going back and forth between layering in 2 or 3 phone books will enable you to put more flowers inside, especially if you stack the ones you are not using to begin flattening them as you load.
- Stack the telephone books and store in a cool dry place (such as a closet) until the flowers and leaves are paper thin and dry to the touch. The more weight that is on the telephone books, the less time it will take for the flowers to dry. The flatter and thinner the plants being pressed, the less time they will take. (Note: I tried the phone books outside in my protected breezeway and also in my basement, but the flowers molded. The floor of my indoor coat closet worked best because it is dry and cool. I simply stack the phone books for weight.)
- I typically fill a dozen or more phone books in the spring, and a few in the summer. By autumn these botanicals are dry enough to unload, and then I fill the phone books with fall leaves and flowers. I empty these the next spring.
- You can use the telephone books over and over for pressing. If any pages become discolored with mold, just tear them out and discard. I have some telephone books from the mid-1990’s that I am still using. If you work in a large facility, collect old phone books when they are being updated. Another great place to find them is in paper recycling collection bins.
- When the flowers and foliage are dry, gently remove them from the telephone books. Flip slowly through the telephone book to find and extract botanicals. It may be helpful to flip from front to back, then back to front several times to spot all your botanicals. If a flower is stuck to the page, carefully and gently rub your finger on the back side of the page to release the flower without tearing it.
- Store pressed botanicals flat, and always hold them carefully from underneath. Pinching them too hard will cause them to shatter. Pressed plants can be stored in paper envelopes, file folders, or in Ziploc plastic bags. They need to be stored flat, and handled carefully—any bending will cause them to shatter. Store the pressed plants in a cool, dry, dark place to keep them the longest. Placing small silica gel packets in the storage container will help keep them dry. Any plants that still have moisture in them can cause the entire set to mold (especially if stored in a hot or sunny place.)
DRYING BOTANICALS IN THE MICROWAVE:
Thicker flowers (roses, marigolds, zinnias, and chrysanthemums), flowers with thicker centers (rudbeckia, coneflowers, anemone coronaria, dahlias, gazanias, heliopsis, daisies, gaillardia), and ray type flowers (asters, daisies, flat mums, coreopsis, and flat dahlias) will dry best in the microwave, rather than in a flower press. This will require experimentation as each microwave is different, and each type of flower will require a different amount of drying time.
Begin by placing a paper towel on a plate, place a few flowers on the paper towel, and cover with a second paper towel. Microwave in bursts of 30 seconds until the flowers are dried. You can also microwave them for longer periods at a lower power level. You will need to experiment with each type of flower you try. Most flowers will shrink as they dry, but will hold their shape and color beautifully. You can also dry these types of flowers in a dehydrator. You will want to store these flowers differently than the flatter ones above. Place in a shoebox, or plastic storage box in layers with paper towels between layers. Place a few silica gel packets inside the box to keep the botanicals dry and prevent them from molding. Store in a cool dry place.
USING PRESSED BOTANICALS:
- When using pressed plants for creative projects, it is usually best to lay out your entire design first before beginning to glue them. The best designs are simple and elegant. Using too many pressed flowers will make your project look too busy. Using handmade or textured paper underneath the pressed plant material will make your design even more special.
- To use pressed flowers or foliage on creative projects, gently dot or brush the back side of them with tacky glue or Mod Podge, then place on desired surface. Mod Podge is a good medium to use for card making because it has some flexibility when dry and will help keep the flower from shattering. For most projects you may want to leave the top side of the botanicals without a top layer of Mod Podge. For projects that will get handled (such as greeting cards or picture frames) you may want to brush one to two thin layers of Mod Podge on top of the botanicals to provide additional protection.
- If you make a mistake, simply glue something else over the top of it! If a petal comes off, just glue it on separately—no one will be the wiser. If a flower comes apart, just glue something else over it. This makes botanical projects very forgiving and successful.
- In working with therapeutic groups, remember that pressed leaves are sturdier than most pressed flowers, especially for children and elders. Start with leaves, and when your participants have the technique down, add some flowers.
- Enjoy being creative! Don’t limit yourself to making only pressed flower cards. Create book covers, bookmarks, and use pressed plants on boxes, candles, lampshades, and other objects around the house. Use pressed flowers to decorate a frame around a mirror or picture frame.
- Whatever you create, remember you are preserving nature’s beauty for a lifetime!

